Your cart is currently empty!
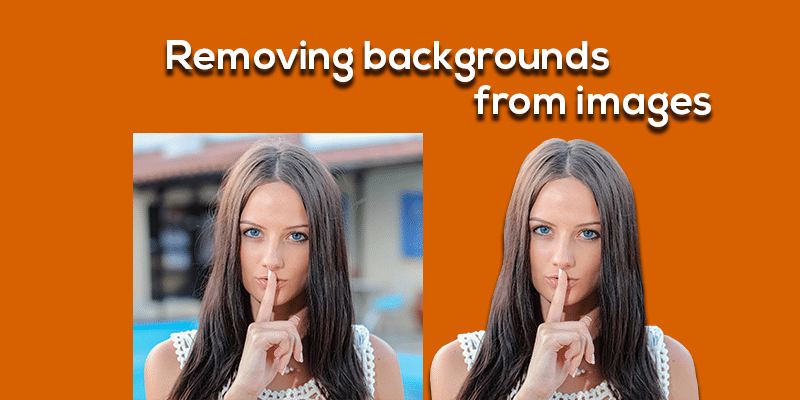
Removing backgrounds from images
[et_pb_section admin_label=”section” transparent_background=”off” background_color=”#ffffff” allow_player_pause=”off” inner_shadow=”off” parallax=”off” parallax_method=”off” custom_padding=”0px||0px|” padding_mobile=”on” make_fullwidth=”off” use_custom_width=”off” width_unit=”on” make_equal=”off” use_custom_gutter=”off”][et_pb_row admin_label=”Row” make_fullwidth=”on” use_custom_width=”off” width_unit=”on” use_custom_gutter=”on” gutter_width=”1″ padding_mobile=”on” allow_player_pause=”off” parallax=”off” parallax_method=”off” make_equal=”off” parallax_1=”off” parallax_method_1=”off” column_padding_mobile=”on” custom_padding=”0px||0px|”][et_pb_column type=”4_4″][et_pb_image admin_label=”Image” src=”http://legacy.divistride.com/wp-content/uploads/2016/08/deep-ecthed.png” show_in_lightbox=”off” url_new_window=”off” use_overlay=”off” animation=”left” sticky=”off” align=”left” force_fullwidth=”off” always_center_on_mobile=”on” use_border_color=”off” border_color=”#ffffff” border_style=”solid”] [/et_pb_image][/et_pb_column][/et_pb_row][et_pb_row admin_label=”row”][et_pb_column type=”4_4″][et_pb_blurb admin_label=”Blurb” title=”Removing backgrounds from images” url_new_window=”off” use_icon=”off” icon_color=”#d76000″ use_circle=”off” circle_color=”#d76000″ use_circle_border=”off” circle_border_color=”#d76000″ icon_placement=”top” animation=”top” background_layout=”light” text_orientation=”left” use_icon_font_size=”off” header_font=”|on|||” header_font_size=”25″ use_border_color=”off” border_color=”#ffffff” border_style=”solid”] [/et_pb_blurb][et_pb_text admin_label=”Text” background_layout=”light” text_orientation=”left” use_border_color=”off” border_color=”#ffffff” border_style=”solid”]
Recently Elegant Themes published a post about creating different styles that can be applied to the sign-up modules, my favourite was the bio sign-up where they have a photo of the person whose site it is sitting on top the sign-up.
I know a lot of people might not know how to remove the background from their images to replicate that style, so today I’m going to show you how simple it is to remove a background image from a photo.
You will probably find a lot more uses for this tutorial than just a sign-up module. just so you know this useful skill you are learning is known as deep etching.
Find an image you want to remove the background from and open it in photoshop, for this tutorial, I downloaded one from Pexels.
[/et_pb_text][et_pb_image admin_label=”Image” show_in_lightbox=”on” url_new_window=”off” use_overlay=”off” animation=”left” sticky=”off” align=”left” force_fullwidth=”off” always_center_on_mobile=”on” use_border_color=”off” border_color=”#ffffff” border_style=”solid” src=”http://legacy.divistride.com/wp-content/uploads/2016/08/portrait-outdoor-woman-woman-portrait.jpg”] [/et_pb_image][et_pb_text admin_label=”Text” background_layout=”light” text_orientation=”left” use_border_color=”off” border_color=”#ffffff” border_style=”solid”]
Now in photoshop on the right-hand side where it shows your layers, at the bottom, there are a bunch of icons at the bottom click on the square with a circle in it, when you click on it notice that your layer now has a white box next to the image? that white box is a layer mask which allows us to remove the background.
[/et_pb_text][et_pb_image admin_label=”Image” show_in_lightbox=”on” url_new_window=”off” use_overlay=”off” animation=”left” sticky=”off” align=”left” force_fullwidth=”off” always_center_on_mobile=”on” use_border_color=”off” border_color=”#ffffff” border_style=”solid” src=”http://legacy.divistride.com/wp-content/uploads/2016/08/layermask.gif” /][et_pb_text admin_label=”Text” background_layout=”light” text_orientation=”left” use_border_color=”off” border_color=”#ffffff” border_style=”solid”]
Next, we need to select the polygonal lasso tool, then we are going to zoom in so we can have a closer look at person enough so that we won’t be leaving any background on the sides of the person, so let’s start outlining the person in our image.
[/et_pb_text][et_pb_image admin_label=”Image” show_in_lightbox=”on” url_new_window=”off” use_overlay=”off” animation=”left” sticky=”off” align=”left” force_fullwidth=”off” always_center_on_mobile=”on” use_border_color=”off” border_color=”#ffffff” border_style=”solid” src=”http://legacy.divistride.com/wp-content/uploads/2016/08/deep-etch-start.gif” /][et_pb_text admin_label=”Text” background_layout=”light” text_orientation=”left” use_border_color=”off” border_color=”#ffffff” border_style=”solid”]
once you’ve outlined a bit of the background image press delete and it will delete that part of the background image. In the image above you will notice I only removed a small segment of the background, that because it always a good idea to do it in parts. So now you just basically need to repeat what we did previously until you’ve made you way around the person in your photo.
[/et_pb_text][et_pb_image admin_label=”Image” show_in_lightbox=”on” url_new_window=”off” use_overlay=”off” animation=”left” sticky=”off” align=”left” force_fullwidth=”off” always_center_on_mobile=”on” use_border_color=”off” border_color=”#ffffff” border_style=”solid” src=”http://legacy.divistride.com/wp-content/uploads/2016/08/deep-etched-around-her.png” /][et_pb_text admin_label=”Text” background_layout=”light” text_orientation=”left” use_border_color=”off” border_color=”#ffffff” border_style=”solid”]
As you can see I’ve skipped a forward quite a bit I’ve finished going around her in my image. I’m sure depending on your image you’ve probably have had to trim a person strands of hair that sticks out a bit in random places? this is where you are going to have to take creative licence and do what you think will look best, otherwise, you going to spend a lot more time trying to get the image right.
Now all that left to do is delete the remaining background from the image and to crop it your desired size, so with the polygonal lasso tool draw a line between your person and the remaining background and then go along the outside of your image until you able to connect with your starting point and then hit delete, now you should have just your person left. I’ve added a background colour to my image so that you can see there no background left.
[/et_pb_text][et_pb_image admin_label=”Image” show_in_lightbox=”on” url_new_window=”off” use_overlay=”off” animation=”left” sticky=”off” align=”left” force_fullwidth=”off” always_center_on_mobile=”on” use_border_color=”off” border_color=”#ffffff” border_style=”solid” src=”http://legacy.divistride.com/wp-content/uploads/2016/08/removing-baground.gif” /][et_pb_text admin_label=”Text” background_layout=”light” text_orientation=”left” use_border_color=”off” border_color=”#ffffff” border_style=”solid”]
I hope that you find this tutorial useful, I personally love knowing how to do this to an image it helps a lot with clients websites.
[/et_pb_text][/et_pb_column][/et_pb_row][/et_pb_section]
Comments
2 responses to “Removing backgrounds from images”
-
Good video although it looks unnatural as a lot of details of the hair are left out!
-
I think it comes down to everyone choice, trying to get hair perfect can consume quite a bit of your time.
-


Leave a Reply